

Remember this post here when I wanted to make an apple door hanger for my summer bucket list? Well, I finally did it! Here is what you need:
-About 3/4 yard of burlap ($3.99 at JoAnns or Hobby Lobby)
-Arylic Paint (2-3 small containers for the main color)
-Ribbon or Wire to hang it
-Hot glue
-Recycled Wal-mart bags
Let me start by saying that I purchased red burlap thinking for a red apple it would be easier. Well...not so much. It was SUPER hard to get the green of the leaf and the white polka dots to get back to the right color, but live and learn, right?
First I freehanded the apple and cut it out.


Next I began painting my polka dots. I used the round sponges on a stick to do this...made it MUCH easier than freehanding it!I also added a little accent on the leaf and stem.

Hot glue the front and back together, leaving a gap to stuff.

Stuff it with recycled Wal-mart bags. You needed something to do with those anyway, right?

Hot glue ribbon or wire hanger on back. ** A lot of these are shown with the wire at the top. I didn't want mine to hang that low on the door so I hot glued it about 1/3 way down the back of the apple. Didn't get a picture..sorry!
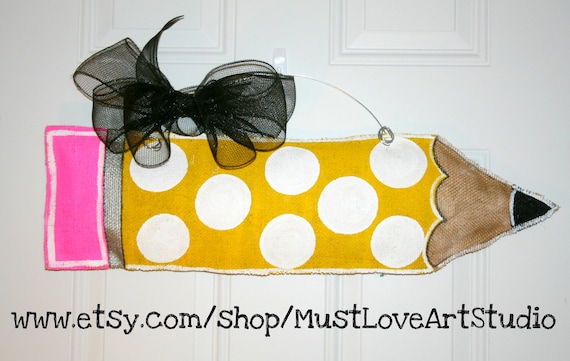
Here is my finished product! I'm pretty happy with it! I want to hang it on my front door...hubby thinks maybe not! :) He doesn't get it!

If I get to hang the apple on my front door at home, I purchased the burlap and paint to create this for my classroom door!
Feel free to jump over and join Tara in Made it Monday!


Oh my goodness! That is so cute.
ReplyDeleteKristi
Learning's a Hoot
What a super cute idea! Thanks for sharing. I am a new follower and am glad to have found you.
ReplyDeleteHappy Teaching,
Laura
TIPS: Teach, Inspire, and Prepare Students
Way cute! You did a great job :)
ReplyDeleteElizabeth
Fun in Room 4B
This is so cute! I'm loving all the cute ideas with burlap I have seen. Thanks for sharing.
ReplyDeleteKrista
stellar-students
precious!
ReplyDelete✣ Miss Nelson✣
Miss Nelson’s Blog
Love it! You should make these for all of your best friends *wink* hehe jk
ReplyDeleteBlessings,
Jessica
✏ Mrs. Stanford's Class ✏
❤
You did a wonderful job!! I love it!
ReplyDeleteAimee
aimee@vanmiddlesworth.org
Pencils, Books, and Dirty Looks
Love it!
ReplyDeleteHooty's Homeroom
LOVE your project! Thanks for the great tutorial!
ReplyDeleteIt turned out so cute! I'm loving these burlap signs and will have to make some myself!!!! Another thing to add to the project list! lol Thanks for sharing!!
ReplyDeleteCathy :)
C is for Cookies, Cakes, Children, Classroom, and Crafts
Love it!! I've been wanting to do the apple and now I have the inspiration!
ReplyDeleteVickie
Mrs. Plant's Press
Ahh! I love your burlap apple sign. You did a fantastic job! :)
ReplyDeleteLisa
Learning Is Something to Treasure
haha! HOW funny!! You apple is super cute!! Love it!!
ReplyDeleteNicole
Rowdy in Room 300
Thanks so much for stopping by my blog !! I am now your newest follower!! I AM OBSESSED with this apple!! SO CUTE!!!!
ReplyDeleteBridget
Little Lovely Leaders
Cute!
ReplyDeleteThis is darling, thanks or sharing.
ReplyDeleteJill
Bubbalulu.blogspot.com
Very cute! You did a great job! I'm a Kentucky teacher too!!
ReplyDeleteJackie
Third Grade's A Charm
LOVE!
ReplyDelete❤Teri
A Cupcake for the Teacher
I have been wanting to make these both SO bad!! I need to get started :)
ReplyDeleteVery cute apple! Thanks for sharing it.
ReplyDeleteJanna
Fabulous Finch Facts
These are so cute! I just love apples, and apple with polka dots are even better!
ReplyDeleteI am your newest follower. I would love to have you come by and visit!
www.ateacherwithoutaclass.com
Love your apple! I have pinned this project! Not sure it will turn out as cute as everyone elses....but I will give it a shot!!! So cute! Thanks for linking up:)
ReplyDelete4th Grade Frolics
Hi there, Thanks for the tutorial! I have a tip: when you paint a green stem over the red apple, paint it white FIRST and then green. This will help make the green POP off the red and also reduce the number of coats you'll have to do. If you try to paint green directly on the red, it will be darker than you want and multiple coats won't really lighten it. (Though yours looks GREAT, I might add.) Anyway, this works with any colors, just used your project colors as an example. Hope this helps! =D
ReplyDelete